FAQ for Jira Cloud
Once you have installed User Management you will need to specify what actions you want it to take, on which users, at what time and where to save the logs. In order to do this, you will need to create Scheduled User Actions schemes.
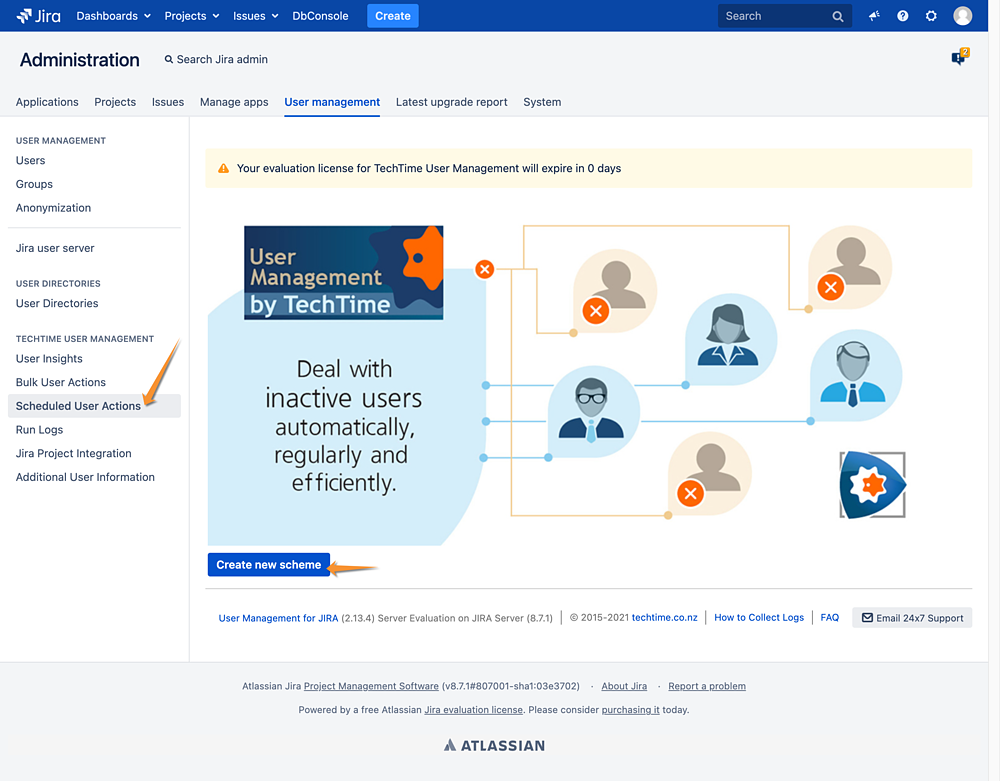
The following "How to" walks you through the Schemes' configuration steps in order of the screens you will be presented with. If you would like guidance on how to best set up your scheduled actions, feel free to get in touch via the "Email 24x7 Support" link.
Step 1 - Configure Trigger Screen
On the first screen, the Configure trigger screen, you can configure the following:
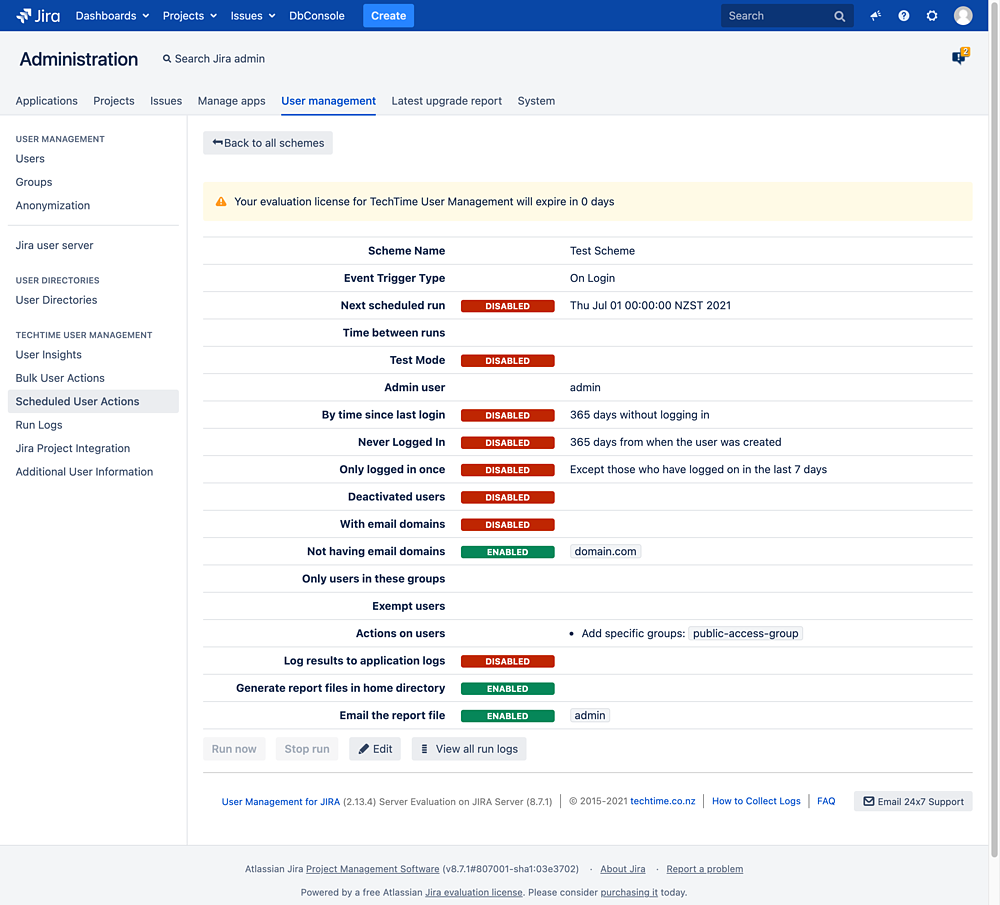
- On Login: Actions will be triggered when a valid user successfully logs in.
- On Create: Performs actions on user creation.
If you have no valid license you can configure User Management, but no actions will be performed.

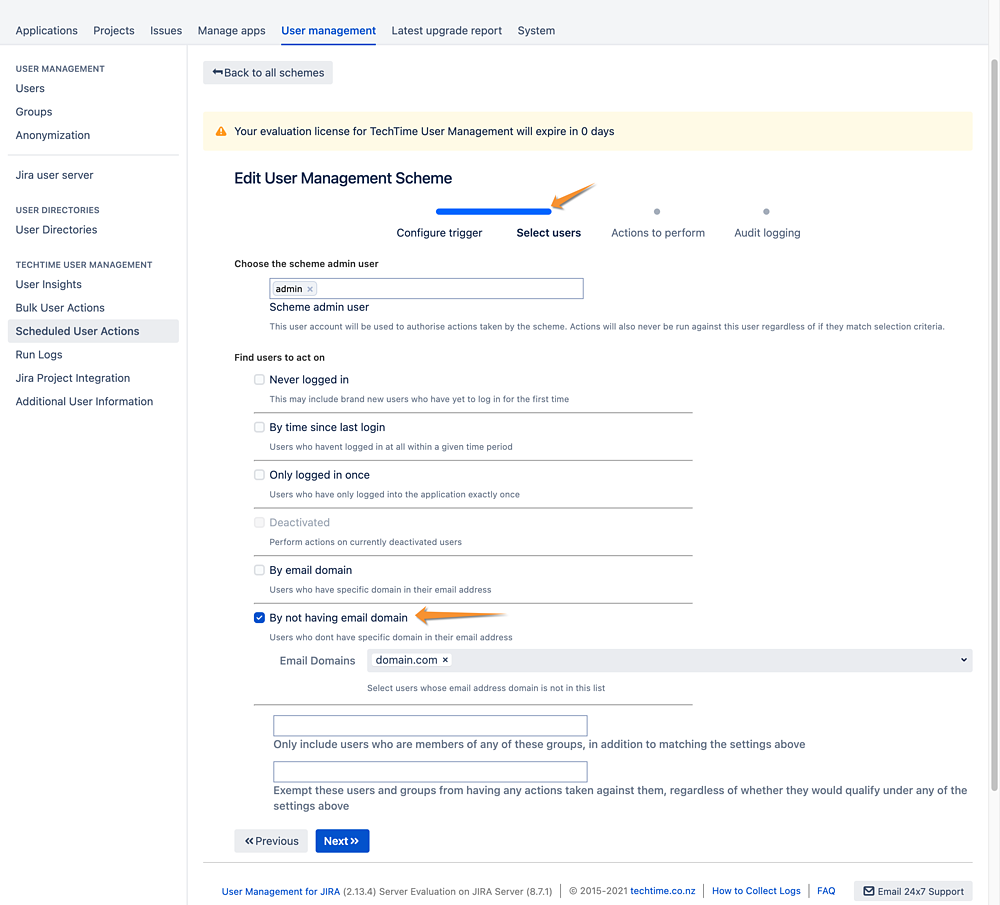
Step 2 - Select User Screen
On the second screen, the Select User screen, you can configure which users will be included in the clean up (please note all conditions are independent of each other):
- Never Logged In: Tick this box to select users who have never logged in. Also allows you to specify an exemption period, so that users who have been created very recently are not selected. (Not applicable to user creation).
By time since last login: Tick this box to clean up users who have not logged in within a certain time period. (Not applicable to user creation).
- Only logged in once: Tick this box to clean up user who have only logged into the application once for all time. Enter an exemption period, e.g. 3 days. In this case users who only logged in once, but within the last 3 days, will not be selected. This feature is useful to tune the definition of "infrequent users". (Not applicable to user creation).
- Deactivated: Can not be used for user login or creation.
- By email domain: Tick this box to select users whose email domain matches one of the specified email domains.
- By not having email domain: Tick this box to select users whose email domains do not matches any of the specified email domains.
Further tune up the results:
- Only include groups: Enter groups here, to limit the effects of the scheme to only users in the specified groups.
- Exempted users: Enter all the groups and users you want to be completely exempt from the clean up.
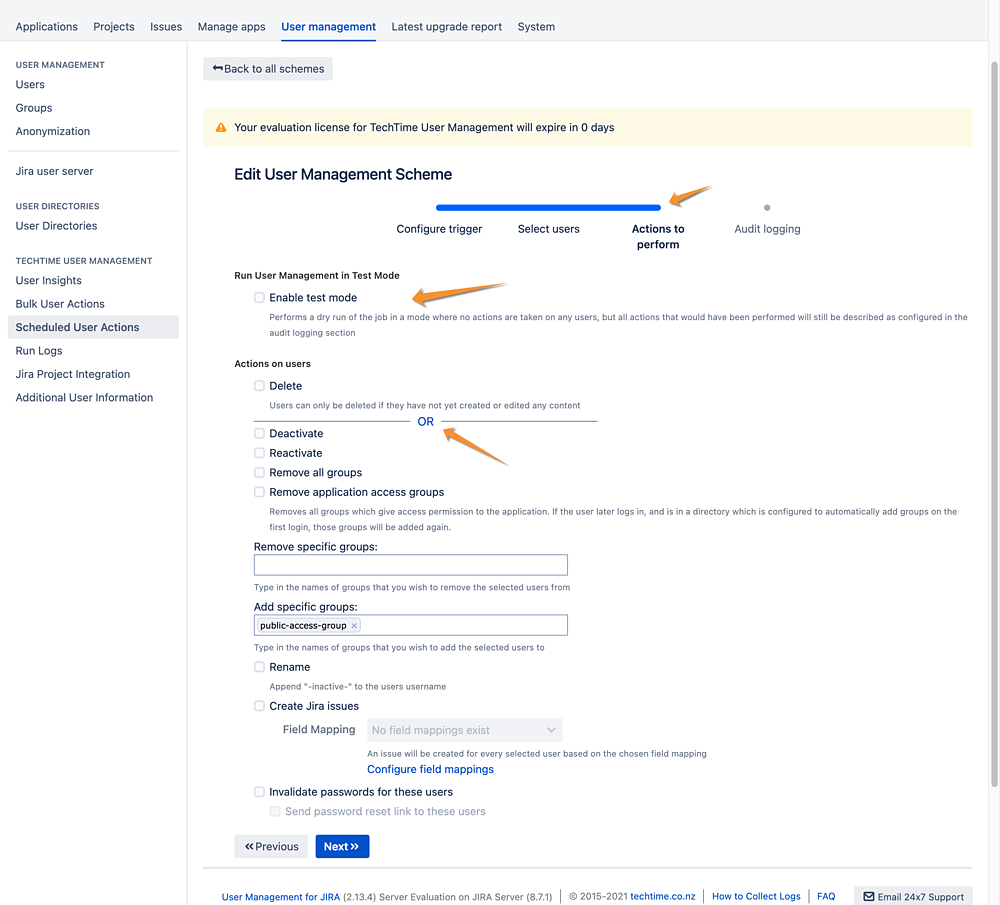
Step 3 - Actions to Perform Screen
On the third screen, the Actions to Perform screen, you can configure what actions should be performed:
- Enable Test Mode: Whether or not you want User Management to perform a test/dry run. A test run will perform the same audit logging as a normal run, but won't take any actions on the users.
After a test run if you are happy with the report you can disable Test Mode and re-run the task, so that User Management will perform the actions on the users. - Actions on Users:
- Delete the user. If this option is selected and it is not possible to delete the user, the options selected below will be performed on the user: Can not be used for user login or creation.
- Deactivate the user: Can not be used for user login or creation.
- Reactivate the user: Can not be used for user login or creation.
- have them removed from all groups, or
- have them removed from all application access groups, or
- have them removed/added from/to specific groups.
- Rename: You can have users suffixed with a '-inactive' to their username: Can not be used for user login or creation.
- Create Jira Issues: (User Management Jira only) Creates a Jira issue for each selected user. See this article for a discussion of how this works: User Management - Create Jira issues action.
- Invalidate passwords: Resets the password to a securely generated random string, so that the user will not be able to log in with their existing password. There is also an option to send password reset links to these users: Can not be used for user login or creation.
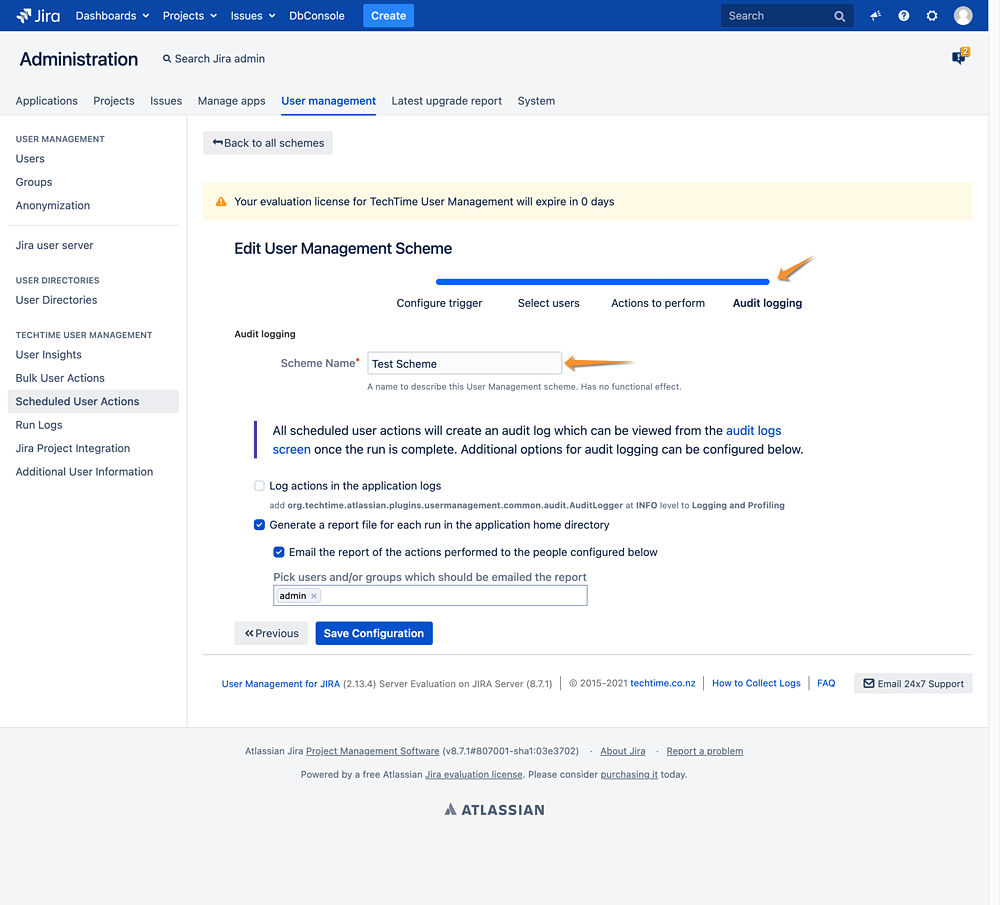
Step 4 - Audit Logging Screen
All schemes will create in-product run logs which can viewed from the run logs screen. However additional audit logging may also be chosen.
On the fourth screen, the Audit Logging screen, you will create a name for your scheme and configure the following:
- Whether actions should be logged into the application log files.
- If you want a standalone report file to be created for each run.
- Who should receive the report via email.
Step 5 - Administration Screen
The fifth screen, the Scheme Overview screen, shows you all the options you have chosen and allows for you to edit the scheme if required.

Pair User Management with EasySSO for the Atlassian Suite. Visit the Atlassian Marketplace for more information.