Are EasySSO Server Licenses Still Available to Purchase?
LOGS THAT WE WILL NEED
For NTLM/Kerberos authenticators we will need jespa.log (steps 1-7) and the base application log e.g. atlassian-jira.log (step 8). We may request a HAR file too, but this doesn't happen often.
For SAML authenticator we will need the base application log e.g. atlassian-jira.log (step 8) and a HAR file
For X.509 and HTTP Headers authenticators we will need the base application log e.g. atlassian-jira.log (step 8) and ultimately any logs you may have on your proxy (since certificate headers and HTTP headers are supposed to be set by a trusted proxy, and only by that)
SETTING THE LOG LEVELS FOR IOPLEX JESPA LOG
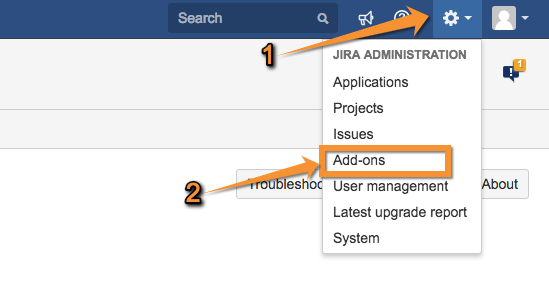
- Click on the Administration Cog on the top right corner of the screen
- From the drop down menu select Add-ons
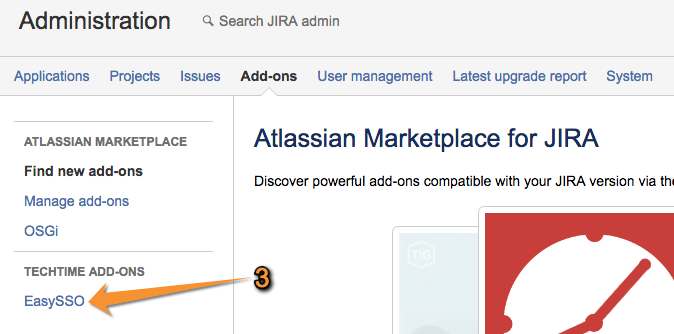
- Locate and click on EasySSO under TECHTIME ADD-ONS on the left side of the screen
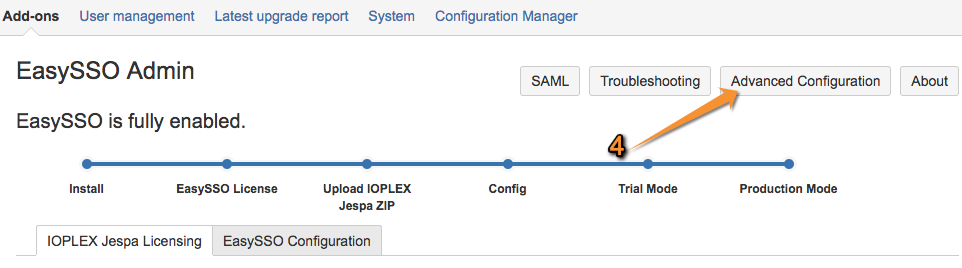
- Click on the Advanced Configuration button on the top right corner (via NTLM/Kerberos in EasySSO 4.0+)
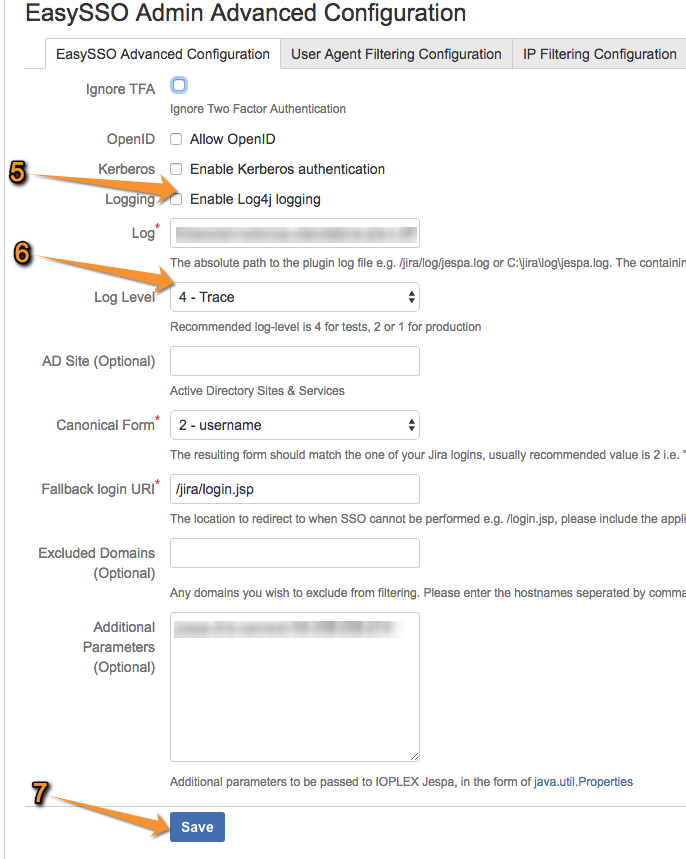
- Review the 'Enable Log4j logging' box. Make a note of the original setting and uncheck this box if it is checked.
- Set the 'Log Level' to 4 - Trace. Make a note of the original setting.
- Once changes have been made, click Save
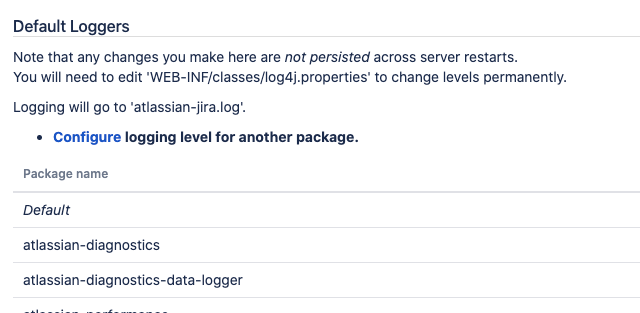
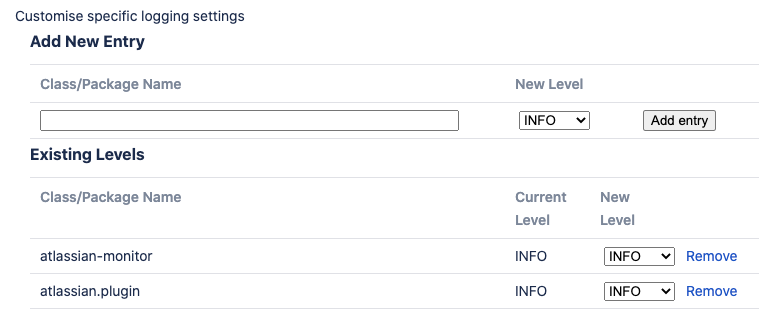
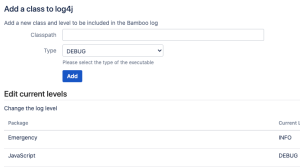
8. Enable DEBUG level logging for the 'org.techtime' package. You will have to add logging for this package. This will not survive a restart i.e. if you are restarting you will have to add the package again.
Follow the instructions below based on your application:
| Atlassian application | How to enable Debug level logging |
|---|---|
| Jira | |
| Confluence | |
| Bitbucket | Server debug logging for Bitbucket You will have to do it with PUT REST call curl -u <ADMIN_USERNAME> -v -X PUT -d "" -H "Content-Type: application/json" <BASE_URL>/rest/api/latest/logs/logger/org.techtime/debug to turn it off afterwards issue another PUT REST call curl -u <ADMIN_USERNAME> -v -X PUT -d "" -H "Content-Type: application/json" <BASE_URL>/rest/api/latest/logs/logger/org.techtime/info |
| Bamboo | |
| Fisheye / Crucible |
RE-TESTING EASYSSO
9. Log out of the application and close your browser or use an Incognito/In-Private browsing.
10. Using the same browser, navigate to your Atlassian application which has your EasySSO Add-on. If EasySSO is working correctly, you will automatically be logged in. If EasySSO is not working correctly, login as admin and proceed to the following section 'Retrieving the logs'. To bypass NTLM/Kerberos SSO append ?anon=1&logout=1 to the URL. To bypass SAML SSO append ?stopsso=1 to the URL.
RETRIEVING THE LOGS
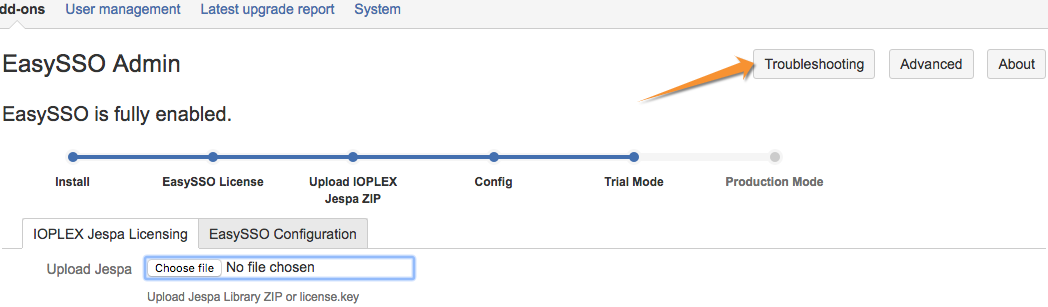
11. Open the EasySSO Admin screen via the Administration/Add-ons/TECHTIME ADD-ONS/EasySSO and click on the 'Troubleshooting' button
12. See the below table to determine which log files need to be downloaded and sent to support@techtime.co.nz. Download the log files listed in the table below based on your application. Ignore the "rotated" log files with number of date suffixes e.g. "atlassian-jira.log.1". Note: IOPLEX Jespa log file is usually called "jespa.log" but it is possible to have it renamed in EasySSO Advanced Configuration screen. If you don't see "jespa.log" please review your settings in Administration/Add-ons/TECHTIME ADD-ONS/EasySSO/Advanced Configuration
| Application Name | Required Log Files |
|---|---|
Confluence | atlassian-confluence.log jespa.log |
Jira | atlassian-jira.log jespa.log |
Bitbucket | atlassian-bitbucket.log jespa.log |
Bamboo | atlassian-bamboo.log jespa.log |
Fisheye / Crucible | atlassian-fecru.log jespa.log |
RESTORE ORIGINAL SETTINGS
13. Revert any changes you made in steps 5, 6, and 8 to the original settings.